A complete guide to the TokForge developer API. Start chats, manage models, read conversations, and check live status, all from your computer or another application.
TokForge is free. Android is live on Google Play; iPhone and iPad are in public beta on TestFlight. No account, and it works with the network off once a model is downloaded.
Reading on a computer? Check which models fit your phone, or see real measured speeds on the phone-speed leaderboard.
TokForge includes a built-in local HTTP server, the developer API, with 270+ endpoints on Android for remote control and monitoring. Whether you want to start conversations, load models, read live status, or automate tasks on your phone from a desktop script, the TokForge API makes it possible.
The API is:
/health and /versionThe developer API listens on port 8088 by default and stays off until you turn it on in the app settings.
Before you can connect from your computer, you'll need to enable the API server in TokForge settings.
mytoken123 as a stand-in; use a strong token of your own.127.0.0.1): reachable only from the phone itself or via ADB port forwarding (adb forward tcp:8088 tcp:8088). Use this for development and testing, or when your Wi-Fi blocks device-to-device traffic.0.0.0.0): reachable from any device on your LAN (e.g. http://192.168.1.100:8088/health). Use this for remote control from another computer, AI agents, or Home Assistant. Use only on trusted networks.The Play Store build honors your "Who can connect" choice. If you pick Any device on my network, the server listens on0.0.0.0and is reachable over your LAN on the normal Google Play build. You do not need a debug build or ADB to connect from another device. The default is This phone only (127.0.0.1) for safety, and the access token is required either way.
In short: Settings → Connections → Settings Mode: Advanced → Developer tools (Advanced) → Developer API server (Advanced).
Default port is 8088. You can change it under "Port number" if it clashes with something.
Once the API is enabled, you have two options to connect: direct LAN access or ADB tunneling.
If you bound the API to "All Interfaces" and your phone and computer are on the same network:
curl -H "Authorization: Bearer mytoken123" http://192.168.1.100:8088/healthReplace 192.168.1.100 with your phone's actual IP address. A quick browser test works too: open http://192.168.1.100:8088/health in any browser on the same network. If you see a small block of JSON starting with {, the connection works (/health needs no token). For protected endpoints, send your token as an Authorization: Bearer <token> header.
If /health times out even though both devices are on the same Wi-Fi: some home/guest networks (and "AP isolation" / "client isolation" settings on the router) block devices from talking to each other. That's almost always the router, not TokForge. In that case, fall back to ADB Port Forwarding (Option B below), which connects over a USB/ADB cable instead of the network.
If you bound the API to localhost only, use ADB to forward the port:
adb forward tcp:8088 tcp:8088Then connect via localhost:
curl -H "Authorization: Bearer mytoken123" http://localhost:8088/healthHit the health endpoint to verify your connection is working:
curl -H "Authorization: Bearer mytoken123" http://192.168.1.100:8088/healthExpected response (shortened):
{
  "status": "ok",
  "mnn_loaded": true,
  "gguf_loaded": false,
  "any_model_loaded": true,
  ...
}Here's a detailed tour of the most commonly used endpoints. All examples assume your token is mytoken123 and your phone is at 192.168.1.100:8088.
GET /version.Request:
curl -H "Authorization: Bearer mytoken123" http://192.168.1.100:8088/healthResponse (truncated):
{
  "status": "ok",
  "auto_tune_running": false,
  "device": {
    "model": "Pixel 9",
    ...
  },
  "mnn_loaded": true,
  "gguf_loaded": false,
  "any_model_loaded": true,
  "runtime_mb": <number>,
  "free_mb": <number>,
  "control_plane": {
    "uptime_ms": <number>,
    "request_count": <number>,
    "request_error_count": <number>
  }
}id you use to load it.Request:
curl -H "Authorization: Bearer mytoken123" http://192.168.1.100:8088/models/downloadedResponse (truncated):
[
  {
    "id": 3,
    "name": "Qwen3.5 2B",
    "size_bytes": <number>,
    "model_type": "mnn",
    "context_length": <number>,
    "is_default": true,
    "model_section": "chat",
    "can_load_as_chat": true,
    ...
  },
  {
    "id": 5,
    "name": "Llama 3.2 3B",
    "size_bytes": <number>,
    "model_type": "mnn",
    "context_length": <number>,
    "is_default": false,
    "model_section": "chat",
    "can_load_as_chat": true,
    ...
  }
]/models/downloaded. The call returns once the load has finished.Request:
curl -X POST -H "Authorization: Bearer mytoken123" \
  http://192.168.1.100:8088/models/3/load
Response (truncated):
{
  "status": "ok",
  "model_id": 3,
  "model_name": "Qwen3.5 2B",
  "model_type": "mnn",
  "effective_context_length": <number>,
  ...
}?category= (general, roleplay, creative, thinking, gemma or image) to narrow it. Start a download with POST /models/recommended/{id}/download.Request:
curl -H "Authorization: Bearer mytoken123" http://192.168.1.100:8088/models/recommendedResponse (truncated):
[
  {
    "id": "qwen3.5-2b-mnn",
    "name": "Qwen3.5 2B",
    "parameter_size": "2B",
    "model_type": "mnn",
    "size_gb": <number>,
    "min_ram_gb": 6,
    "hf_repo": "taobao-mnn/Qwen3.5-2B-MNN",
    "category": "general",
    "requires_auth": false,
    ...
  },
  ...
]id from GET /characters). By default the TokForge app also opens the chat screen; send "navigate": false to stay where you are.Request:
curl -X POST -H "Authorization: Bearer mytoken123" \
  -H "Content-Type: application/json" \
  -d '{"character_id": 2}' \
  http://192.168.1.100:8088/conversations/new
Response (truncated):
{
  "status": "ok",
  "conversation_id": 12,
  "character_name": "Aria",
  "backend_type": "mnn",
  "navigated": true,
  ...
}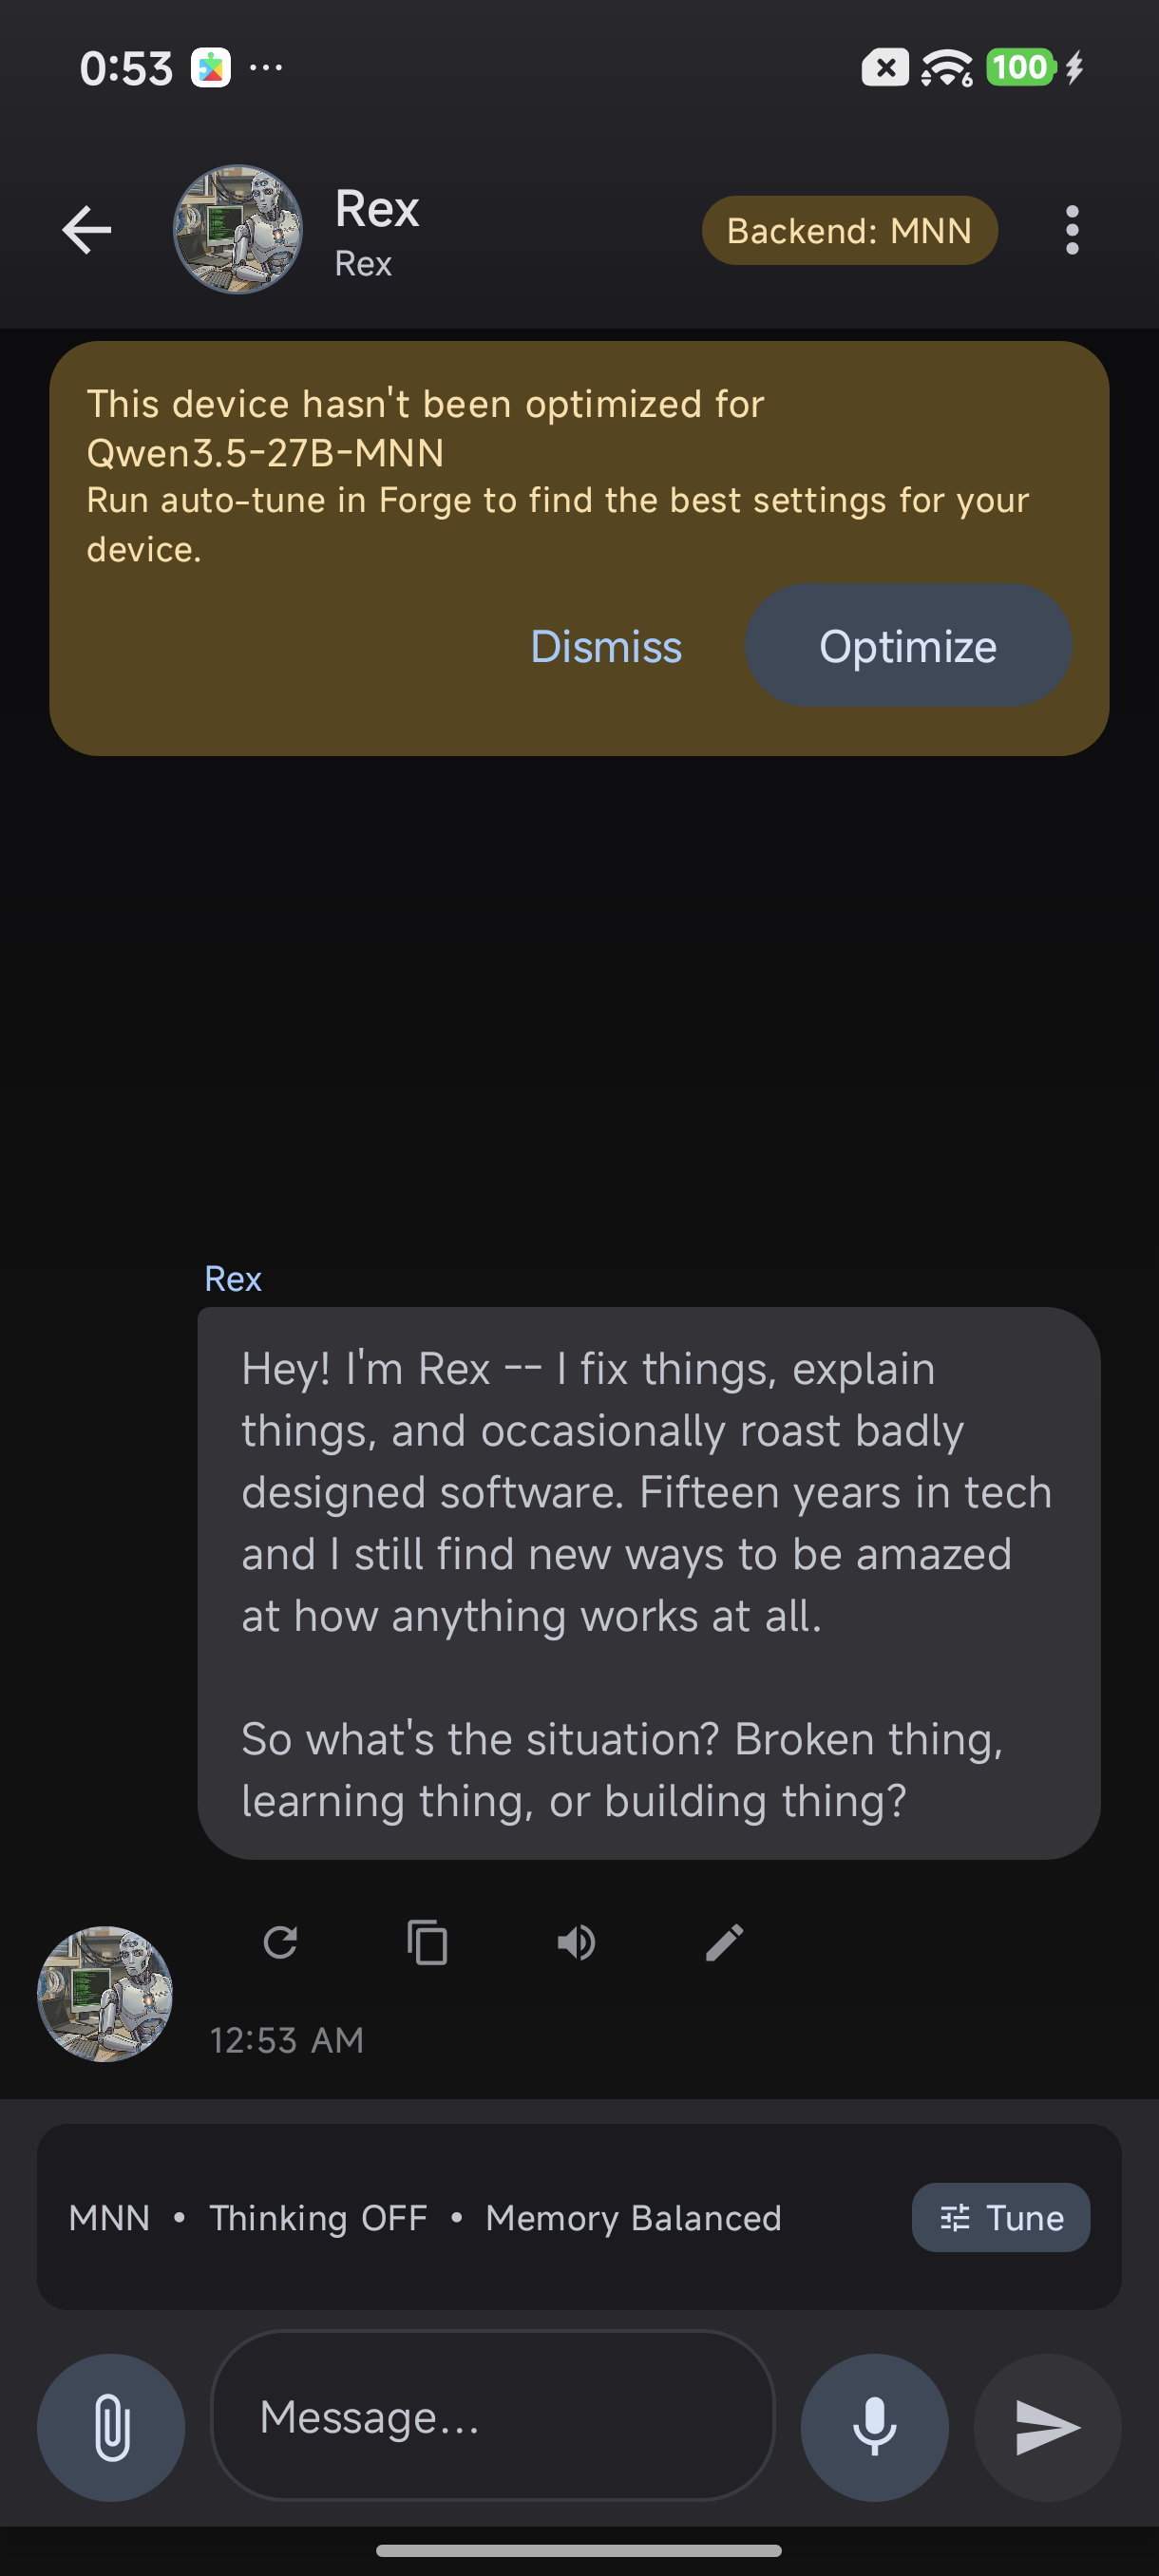
The app navigates to chat when you create a conversation via API
text or message). The call waits for the reply and returns it with the message ids, a token count, the engine used and timing fields. For phone speeds, see the leaderboard.Request:
curl -X POST -H "Authorization: Bearer mytoken123" \
  -H "Content-Type: application/json" \
  -d '{"message": "What is machine learning?"}' \
  http://192.168.1.100:8088/conversations/12/send
Response (truncated):
{
  "status": "ok",
  "conversation_id": 12,
  "user_message_id": 341,
  "assistant_message_id": 342,
  "response": "Machine learning is a branch of artificial intelligence where systems learn patterns from data instead of being explicitly programmed...",
  "token_count": <number>,
  "backend": "mnn",
  "done": true,
  "finish_reason": "stop",
  ...
}Request:
curl -H "Authorization: Bearer mytoken123" http://192.168.1.100:8088/charactersResponse (truncated):
[
  {
    "id": 1,
    "name": "Assistant",
    "description": "A plain, no-persona AI assistant. No character voice, no roleplay framing...",
    "creator": "TokForge",
    "is_favorite": false,
    "has_first_message": false,
    ...
  },
  {
    "id": 2,
    "name": "Aria",
    "description": "Aria is a warm, articulate AI assistant who genuinely enjoys helping people work through problems...",
    "personality": "Warm, patient, intellectually curious, honest about limitations...",
    "creator": "TokForge",
    "is_favorite": false,
    ...
  }
]limit parameter.Request:
curl -H "Authorization: Bearer mytoken123" \
  "http://192.168.1.100:8088/memory/facts?character_id=2"
Response (truncated):
[
  {
    "id": 17,
    "character_id": 2,
    "category": "...",
    "content": "User's name is Alex",
    "importance": <number>,
    "is_pinned": false,
    ...
  },
  {
    "id": 18,
    "character_id": 2,
    "category": "...",
    "content": "User prefers dark mode",
    "importance": <number>,
    "is_pinned": false,
    ...
  }
]Request:
curl -H "Authorization: Bearer mytoken123" \
  "http://192.168.1.100:8088/memory/stats?character_id=2"
Response:
{
  "character_id": 2,
  "facts": <number>,
  "edges": <number>,
  "documents": <number>
}Request:
curl -X POST -H "Authorization: Bearer mytoken123" \
  http://192.168.1.100:8088/control/open-model-browser
Response:
{"status": "ok", "screen": "models"}Request:
curl -X POST -H "Authorization: Bearer mytoken123" \
  http://192.168.1.100:8088/control/open-forge-lab
Response:
{"status": "ok", "screen": "forge"}POST /control/stop-generation.Request:
curl -H "Authorization: Bearer mytoken123" \
  http://192.168.1.100:8088/control/generation-status
Response (truncated):
{
  "mnn_loaded": true,
  "gguf_loaded": false,
  "live_generation": {
    "active": true,
    "status": "...",
    "conversation_id": 12,
    "backend": "mnn",
    ...
  },
  ...
}metrics_auth_token_set instead.Request:
curl -H "Authorization: Bearer mytoken123" \
  http://192.168.1.100:8088/settings
Response (truncated):
{
  "user_name": "...",
  "metrics_server_enabled": true,
  "metrics_server_port": 8088,
  "metrics_server_bind_host": "0.0.0.0",
  "metrics_auth_token_set": true,
  "theme_mode": "DARK",
  ...
}{"value": ...}; unknown keys return 404 and bad values return 422. Read a single value back with GET /settings/{key}.Request:
curl -X POST -H "Authorization: Bearer mytoken123" \
  -H "Content-Type: application/json" \
  -d '{"value": "LIGHT"}' \
  http://192.168.1.100:8088/settings/theme_mode
Response (truncated):
{"status": "ok", ..., "saved": {"theme_mode": "LIGHT", ...}}lines and filter parameters.Request:
curl -H "Authorization: Bearer mytoken123" \
  "http://192.168.1.100:8088/debug/logcat?lines=200"
Response: plain-text log lines that mention TokForge (change the match with filter).
Let's create a practical Python script that connects to TokForge, lists models, starts a conversation, and sends messages.
Requirements:
requests library: pip install requestsComplete working example:
import requests
import json
import time

# Configuration
API_BASE = "http://192.168.1.100:8088"
TOKEN = "mytoken123"

def get_headers():
    """Return headers with bearer token"""
    return {
        "Authorization": f"Bearer {TOKEN}",
        "Content-Type": "application/json"
    }

def check_health():
    """Check API health"""
    response = requests.get(f"{API_BASE}/health", headers=get_headers())
    return response.json()

def list_models():
    """List downloaded models"""
    response = requests.get(f"{API_BASE}/models/downloaded", headers=get_headers())
    return response.json()

def find_character(name):
    """Look up a character's id by name"""
    response = requests.get(f"{API_BASE}/characters", headers=get_headers())
    for character in response.json():
        if character["name"] == name:
            return character["id"]
    raise ValueError(f"No character named {name}")

def start_conversation(character_id):
    """Start a new conversation"""
    data = {"character_id": character_id}
    response = requests.post(
        f"{API_BASE}/conversations/new",
        headers=get_headers(),
        json=data
    )
    return response.json()

def send_message(conversation_id, message):
    """Send a message in a conversation"""
    data = {"message": message}
    response = requests.post(
        f"{API_BASE}/conversations/{conversation_id}/send",
        headers=get_headers(),
        json=data
    )
    return response.json()

# Main execution
if __name__ == "__main__":
    print("Checking API health...")
    health = check_health()
    print(f"Status: {health.get('status')}")
    print(f"Model loaded: {health.get('any_model_loaded')}")
    print()

    print("Listing downloaded models...")
    models = list_models()
    for model in models:
        print(f"  - {model['name']} ({model['model_type']})")
    print()

    print("Starting conversation with Aria...")
    conv = start_conversation(find_character("Aria"))
    conv_id = conv["conversation_id"]
    print(f"Conversation started: {conv_id}")
    print()

    print("Sending message...")
    result = send_message(conv_id, "What is Python?")
    print(f"AI: {result['response'][:100]}...")
    print(f"Finished: {result.get('finish_reason')}")
Save this as tokforge_client.py and run:
python tokforge_client.pyExpected output:
Checking API health...
Status: ok
Model loaded: True

Listing downloaded models...
  - Qwen3.5 2B (mnn)
  - Llama 3.2 3B (mnn)

Starting conversation with Aria...
Conversation started: 12

Sending message...
AI: Python is a high-level, interpreted programming language known for its simplicity...
Finished: stopThe TokForge API is designed for local network use. Follow these best practices:
Always use a strong, randomly generated token. Avoid simple tokens like 123456 or password. The easiest way is to tap "Generate a new token" in the app and copy the result. Example strong token:
akfj9s8df-jklsd9-fjsdklf-sdfj9sdkfj0.0.0.0. The access token is still required. Use only on trusted networks (home WiFi, corporate VPN). Never on public WiFi.The API runs over HTTP without encryption. This is safe for local networks only. Never expose the API to the public internet.
If using the API in scripts, store the token in environment variables, not hardcoded:
import os
TOKEN = os.getenv("TOKFORGE_TOKEN").gitignore for files containing secrets.
You now have all the tools to build powerful automations and integrations with TokForge. Here's what to explore next:
Have a cool use case? Share your API integration with the TokForge community and help others build amazing things.
